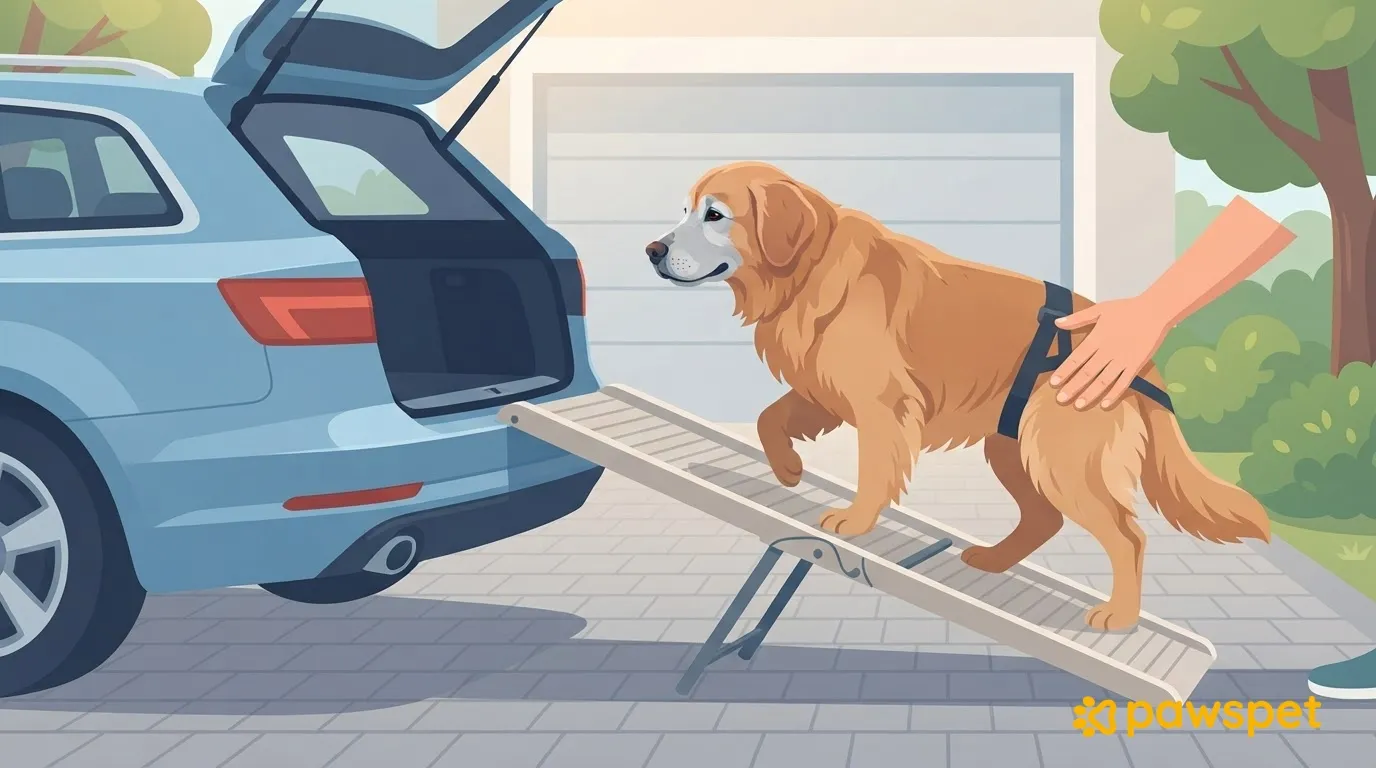
If your dog is senior or large, observe how they get in and out of the car before choosing an aid. Then decide based on the height of the cargo floor or seat, the space you have to use it, and your dog’s weight. Introduce any aid gradually, and have a veterinarian check out any new or worsening difficulty.
Observe how your dog gets in and out
Watch them closely for a couple of trips, ready to support them, and note whether they:
- hesitate in front of the trunk or seat;
- try several times before succeeding;
- slip with their hind paws;
- jump down suddenly when you arrive;
- refuse to get in after a fall.
Start with the car, not the product: use a tape measure to check the height from the ground to the trunk’s cargo floor or the seat, and see how much clear space you have behind or beside the vehicle to open a ramp. Also consider where your dog travels—in the trunk or on the back seat—as this affects the space and movements involved, and where you’ll store the aid when you’re not using it. Write down the measurements and your dog’s current weight: you’ll need them to compare with the specifications of anything you might buy.
Ramp, step or support: how to choose
There’s no single best aid for helping a dog get into a car. Compare the height, available space and your dog’s weight against the criteria in the table.
| When it may help | What to check |
|---|---|
| Ramp: your dog no longer wants to jump and you don’t want to (or can’t) lift them; you have room to set it up | Length in relation to height (the longer it is, the gentler the incline, but the more space it needs); nonslip surface, including for wet paws; width suitable for your dog; stable attachment to the edge; manufacturer’s stated weight capacity compared with your dog’s weight; weight and folded size |
| Step, stairs or platform: your dog can still manage steps well and only needs a lower rise | Stability when your dog steps on with their full weight; steps suited to your dog’s stride |
| Harness with handle or rear support harness: your dog needs support to assist their movement, for example with their hind legs | Fit without rubbing; it’s for assisting movement, not lifting your dog’s full weight |
Get your dog used to the ramp one step at a time
A suitable ramp only helps if your dog accepts it. Work in short sessions, always with someone beside them, a leash attached and treats within reach. Practice going up and down slowly, with support:
- Place the ramp flat on the ground: let your dog sniff it and reward each step onto it.
- Rest the ramp on a low step: follow the same routine, with treats along the way.
- Set up the ramp on the parked car, with the engine off, in a quiet place away from traffic: start with a few steps, then practice going all the way up and down.
Never push or pull your dog on the ramp. If they hesitate, go back to the previous step, and move on only when they’re comfortable, even if that takes several days. Follow the same approach with a step or harness: start at home, calmly and with treats, then try it with the car.
If you need to lift your dog
With a heavy dog, it’s better to have two people: one supports the chest, the other the hindquarters, and you move together. Keep your dog close to your body and bend your knees instead of your back. Don’t lift them by the legs, collar or harness alone. If you’re on your own and can’t lift them without straining, don’t insist: that’s another reason to use an aid. A dog in pain may react unexpectedly: move calmly, and if they whine or stiffen, stop and ask your veterinarian how to handle moving them.
When difficulty is a sign to get checked
Talk to your veterinarian if the difficulty has started recently or is getting worse, or if you notice limping, stiffness after resting, whining when your dog is touched or lifted, or a sudden refusal to get in. Your veterinarian can assess the situation and, if they think it would help, recommend checks, weight management or a rehabilitation program with professionals.
If your dog can’t get up or seems to be in severe pain, don’t wait: call your veterinarian right away. For a checkup, or to find a rehabilitation professional, you can open the «Services» tab in the PawsPet app and filter by service type («Veterinarian», «Rehabilitation») to see the listed services. Availability in your area depends on which providers are listed.
Before your next trip
- A nonslip surface in the trunk or on the seat, so your dog doesn’t slip while getting in and settling down.
- Keep the aid close at hand and practice with it first; don’t bring it out for the first time on departure day.
- Take a break on long journeys so your dog doesn’t stay in the same position for too long.
- When you arrive, attach the leash before opening the tailgate or car door.
- Give your dog a few minutes to settle before letting them out, and don’t let them jump down as soon as you open the door.
This week, try the aid at home with the car parked, and note how your dog responds. If they hesitate or the difficulty gets worse, you’ll have something specific to tell your veterinarian.